
Using the Wix Events app
- Shaun

- Feb 23, 2023
- 2 min read
Updated: Aug 14, 2023
Wix Events is a handy app that allows you to run one-off events and sell tickets.
Here are instructions to use it. These instructions assume we have installed & set up the app for you.
Please note the screenshots below are a test dummy website. Yours may look slightly different.
You only need to access your dashboard to manage the Events app. You DO NOT need to use the main editor.
Setting up an Event
1. Log into your Wix account. This will get you to the Dashboard of your website. Find 'Events' listed on the left hand side.

2. This is your Events dashboard. It will show all previous Events and let you edit them, plus add new ones.
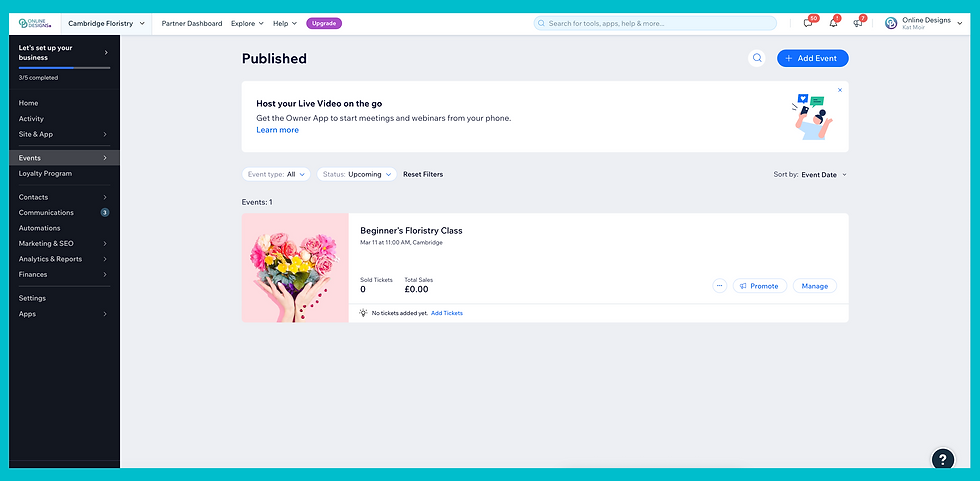
3. Let's add a new event. Click the button '+ Add Event' in the top right. This will set up a new Event. Choose whether you want a ticketed event or RSVP event. Add all the info such as title, description, date & time, and choose an image for it. Then click 'Create Draft' at the top right.

Adding Tickets
4. You have now created the skeleton of an Event. This means the Event exists but you now need to add what tickets are available, and other details. You should now be seeing the 'Overview' of the event which includes a handy tick list of what to do next.

5. Click 'Create tickets'. Then fill in the info about the ticket. For example, the title could be 'General Admission' ticket. It should be self-explanatory to fill in the rest of the info. Click 'Create Ticket' at the top right.

Getting the customer's information
6. You should find yourself back on the Overview screen.
Next, you'll be choosing what information you want to collect from the customer when they buy a ticket. Click 'Settings' on the nav bar. Scroll down to 'Registration Form' and click 'Edit'

7. Choose what information you need from the customer. Examples might be:
- Name
- Email address
- Phone number
- More details about your specific event, for example "Number of children attending" or "Experience with floristry" or "Level of fitness".
You can add this custom question by selecting "Add more options" and 'Custom Question'. Make sure you select 'Long Text Field' and not short, so that the customer has enough room to answer.

Running the Event
8. The event should now be completed and live on the website. Feel free to click around all the other settings and see what else you can change.
When people start buying tickets, you should receive email confirmations and you can view their details using 'Orders' and 'Guests' in the Nav bar.
If for some reason you need to cancel the event, you can do so from the Overview screen. Find the 3 little dots and then click "Cancel Event."
In future, you can duplicate this event from the same mini-menu. This means you can use it as a Draft for your next event.


